Patio Inspiration: Walls

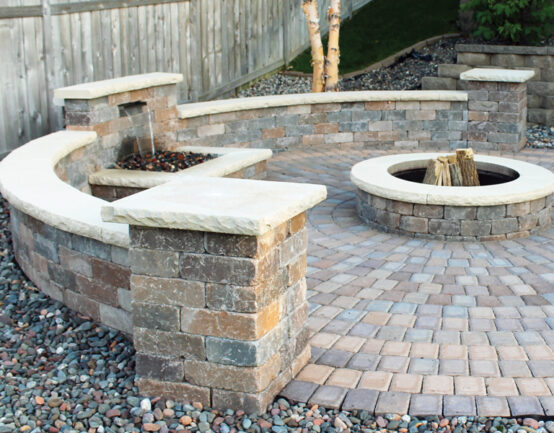
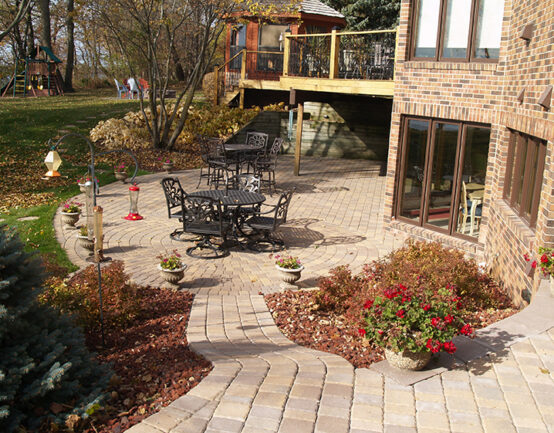
Our Strassen® Wall collection is a free-standing wall, is very versatile, and can complement any backyard feature. These walls can have installed waterfalls, are good for seating walls, can have tops for planting greenery and much more. Be inspired by how Strassen® Walls can enhance your backyard.

Backyard Oasis

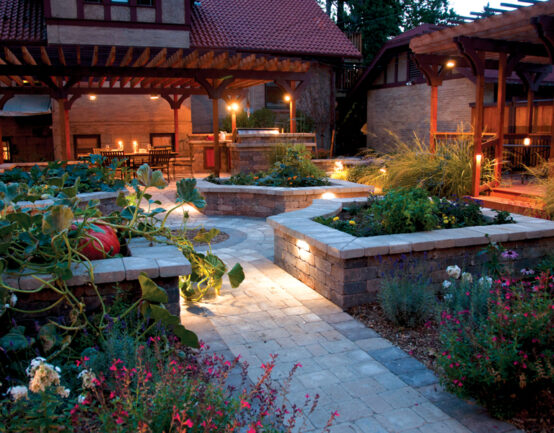
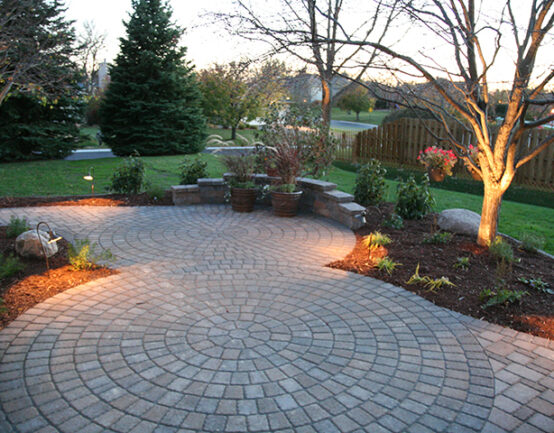
Escape to a fairy tale oasis that’s complete with greenery planted in Strassen® Walls, perfectly placed spotlights to light up the path, and a candlelight dinner for two!

Cozy Campfire

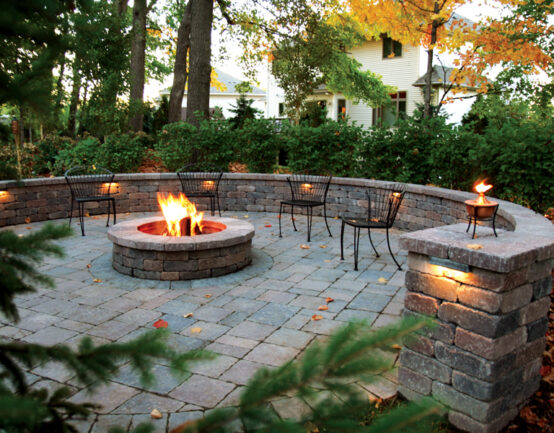
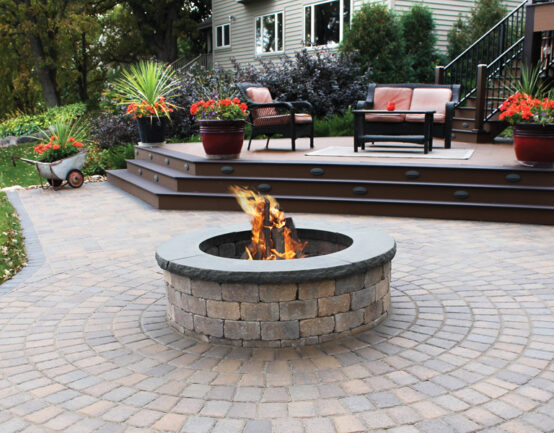
Invite over friends for a fun evening sitting around a fire ring and enjoying the outdoors. Feel secluded from the world and all of its troubles with our enclosed Strassen® Wall and surrounding trees and brush.

Color Splash

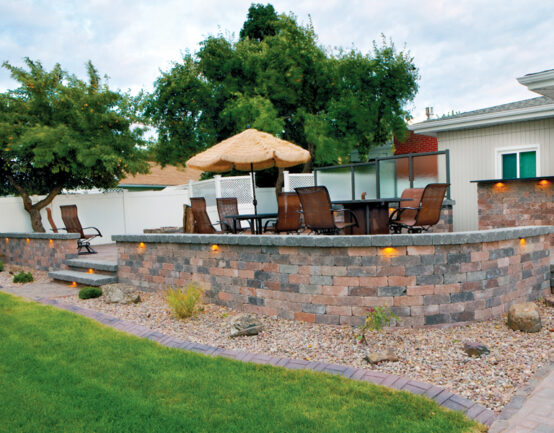
Splash up your backyard with these colorful Strassen® Walls that use both fun peach spring and summer colors as well as the gray tones that will match the fall and winter seasons. Pair these retaining walls with rock landscaping, grassy areas, tables and more- the possibilities are endless!

Summer Day Chilling

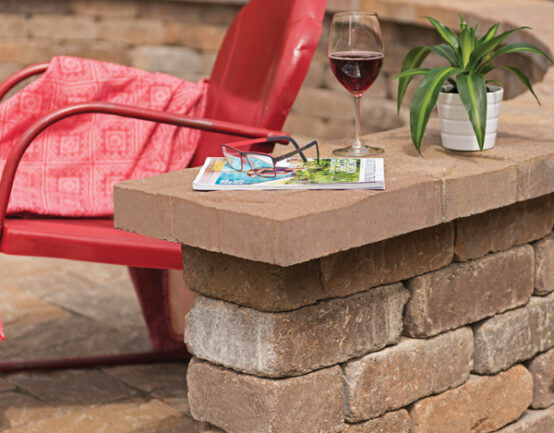
Sit back and relax after a long day of work. Our Strassen® Walls are not only pieces to enjoy looking at, but they are also practical- no more setting down your drink and magazine under you chair and then tripping over them later! Utilize the Strassen® Wall as a perfect place for setting your books, glasses and more!

Waterfall Paradise

Enjoy the sounds of nature with the trickling water fall feature installed in our Strassen® Wall. You won’t have to go far to feel like you are sitting by a creek or a waterfall in the forest; you will have your own waterfall in your front yard or backyard!

Inspired by any of the looks you see here? Let’s chat. 

Borgert is a family-owned company specializing in pavers, slabs, and retaining walls. We are based in Central Minnesota and serve the Midwest including MN, WI, ND, IA, SD, Northern IL, MT, CO, NE. Since 1923, we have been committed to providing high quality products that help our customers dream landscapes become a reality. Find your local Borgert distributor.

How to Care for Permeable Interlocking Concrete Pavement

Permeable interlocking concrete pavement is a great stormwater management solution but it must be maintained to ensure proper drainage to get the longest life out of your pavement. The tips below will also ensure that your pavement is able to properly drain rainfall and snow.

Preventative Maintenance:

Joint Material: Keep the joints filled with the proper material, check and refill every 6 months. The fill should reach the top of the chamfer.

Surrounding Vegetation and Planting: Ensure that the adjacent landscaping is strong, prevents erosion of soils onto the pavers, and does not contribute to clogging from falling leaves or fruits. Promptly remove grass clippings.

Awareness: Ensure anyone working near the site is aware of the system and does not place landscaping materials on the system or close enough to cause future runoff and no snow is piled throughout the winter. Do not allow sanding during the winter.

Lack of maintenance will cause the system to clog, defeating the purpose of using permeable pavement. Clogging will also cause deterioration of the paver as it will sit in a constant state of saturation.

Winter Maintenance:

Snow Removal: Shovel or plow as immediately as possible following a snowfall. Do not pile on permeable surface.

Salt/Deicing Chemicals: Do not use sand. The best option is to use the joint material for grit.

Salt: When the system is clean and snow is removed promptly, far less salt/deicing chemicals should be used. Use proper judgment to gauge the amount of ice. There will most likely be little ice accumulation on the surface.

Maintenance Plan:

  • Inspect the area directly following a rain event to check for standing water (after a major event & at least 3 times a year)
  • Use small-scale techniques to address small areas of clogging
  • Maintain the correct level of joint material
  • General preventative maintenance to reduce the need for major restorative techniques
  • Regenerative Air Vacuum: when major clogging occurs. Recommended 1 – 2 times a year for commercial applications and once every 1-5 years for residential applications, vacuuming frequency depends on usage.

How to Tell if Your Pavers are Clogged:

  • Standing water during or directly following a minor storm event
  • Visible debris in the joints
  • Water running off or pooling in large areas
  • Weed growth

If your pavement is clogged, you can use an air vacuum to remove the top layer of debris and joint material. You can then re-fill the joints and your pavement will infiltrate as normal. If you need assistance, please contact us or icpi.org for more details on maintenance.


Borgert is a family-owned company specializing in pavers, patios, driveways and retaining walls. We are based in Central Minnesota and serve the Midwest including MN, WI, ND, IA, SD, Northern IL, MT, CO, NE. Since 1923, we have been committed to providing high quality products that help our customers dream landscapes become a reality. Find your local Borgert distributor.

Patio Inspiration: Cobble Series™ Pavers

Are you searching for that perfect patio look but just haven’t found it quite yet? Take a stroll through some of our favorite looks featuring our Cobble Series™ Pavers for some patio inspiration.

Enchanting Garden

cobble stone pavers next to a small pond

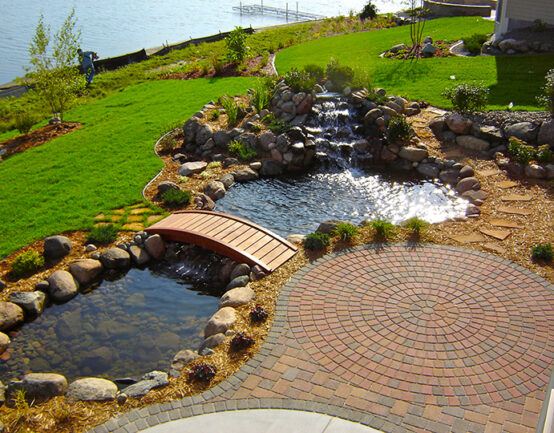
This look isn’t for the fainthearted. If you really want to cultivate a calming, serene space we recommend pairing our Cobble Series™ Pavers with ambitious landscaping. We love how the circular pavers add harmony and balance to the rounded ponds.

Folksy Fireplace

borgert cobble patio and fireplace

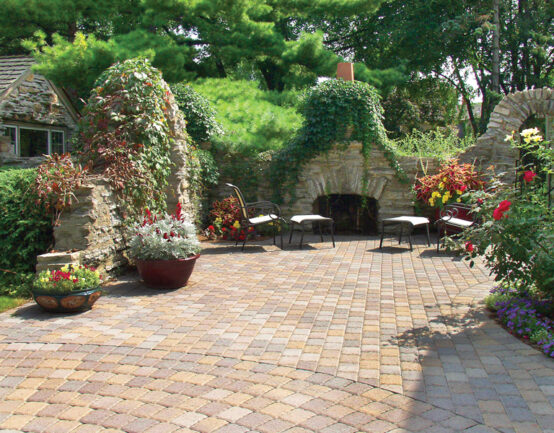
Pairing natural elements with concrete is the perfect way to create a folksy, enchanting look. We love the combination of our Cobble Series™ Pavers with a fireplace and vines draping around a patio wall.

Follow the Brick Road

borgert cobble walkway

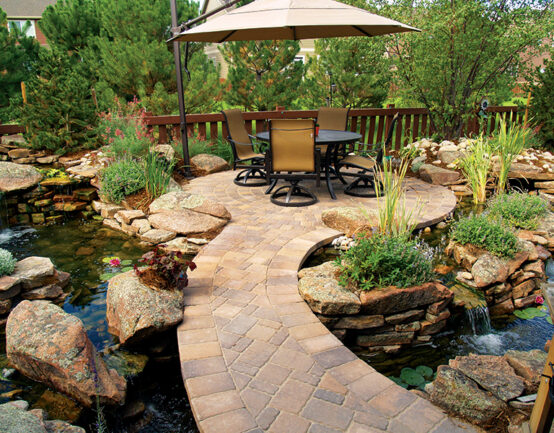
Follow the brick road (Cobble Series™ Pavers) to an oasis in your own backyard! It will feel like you are in a place “somewhere over the rainbow” with surrounding waterfalls and magical landscaping!

All Day Fun

Experience the outdoors all day. Enjoy brunch on the patio and then go play a game of backyard football for a fun family afternoon!

Seeing Double

Patio Inspiration: Cobble Series™ - Swirls

This swirly look is captivating and deceptively simple to install. Two circular patterns using our Cobble Series™ Pavers is better than one! These areas are easy to make your own – try adding a wall (as seen above) or some chairs for a nice gathering spot.

Inspired by any of the looks you see here? Let’s chat. 


Borgert is a family-owned company specializing in pavers, patios, driveways and retaining walls. We are based in Central Minnesota and serve the Midwest including MN, WI, ND, IA, SD, Northern IL, MT, CO, NE. Since 1923, we have been committed to providing high quality products that help our customers dream landscapes become a reality. Find your local Borgert distributor.

Patio Inspiration: Fireplaces and Fire Pits

Now that summer’s in full swing, it’s the perfect time for one of our personal favorite summer activities: hanging by the fire pit. Now’s the perfect time to upgrade your patio with a brand new fire pit or fireplace. Here are some of our favorite looks to inspire you.

Radial Fire Pit

Borgert Fire pit

This classic look is well-rounded (no pun intended). Shake up a simple fire pit by adding a radial pattern with cobble pavers. Placing it in the center of your patio leaves plenty of room for entertaining.

Products featured in this look: Cobble Series™, Cobble Circle and Strassen® Wall Fire Pit by Borgert Products

Here Comes the Sun

Borgert Fireplace

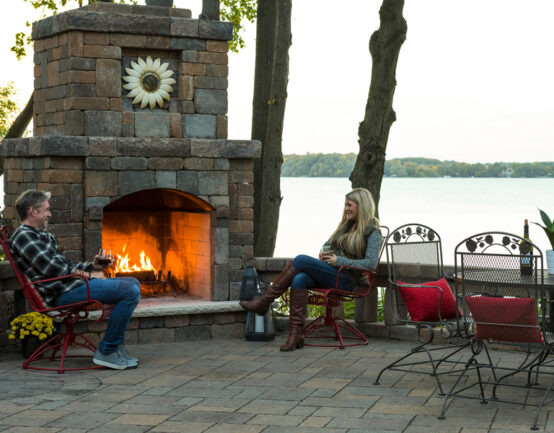
Make a gorgeous fireplace even more stunning with a custom detail – we love this simple sunflower to brighten up any patio.

Products featured in this look: King Arthur by King of Hearths with Strassen® and Madera Walls by Borgert Products 

All-in-one Entertainment

borgert fireplace

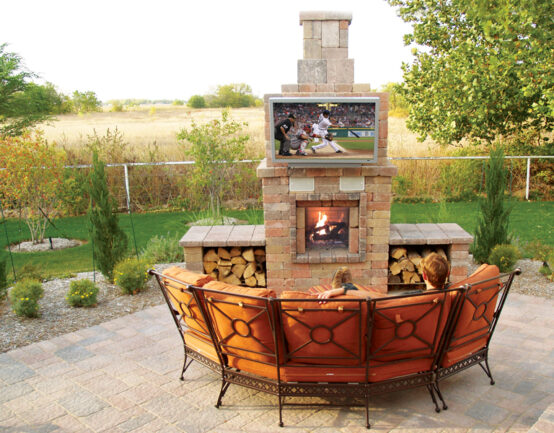
Now this is a true home entertainment system! This gorgeous fireplace features convenient storage and an attached TV. This setup is a must-have for sports fans to grill out while watching the big game.

Products featured in this look: Guinever Fireplace by King of Hearths with Strassen® Wall Veneer by Borgert Products

Cook It Up

Patio Inspiration: Fireplaces - Lancelot Pizza Oven

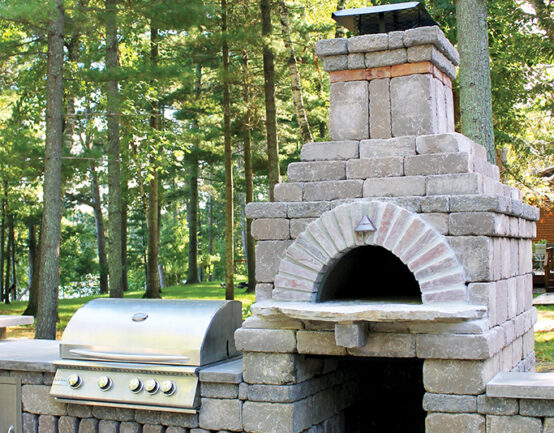
If you love to cook, this is the perfect setup for you! This fireplace features an attached grill for easy grilling and cooking. The brick oven is perfect for making delicious pizzas and other tasty treats.

Products featured in this look: Lancelot Oven by King of Hearths with Strassen® Wall Veneer by Borgert Products

Special Space

Patio Inspiration: Fireplaces

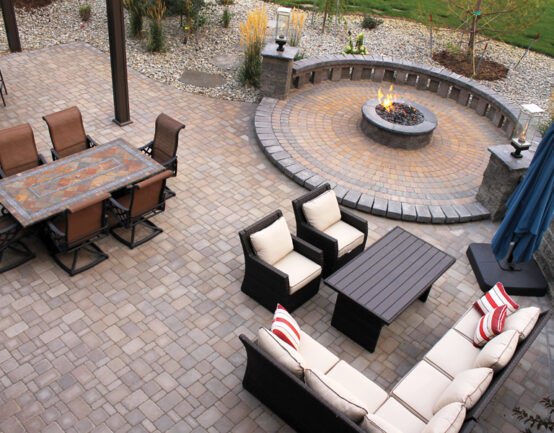
If you’ve got the room, set your fire pit apart from the rest of your patio with a designated space. We love pairing our Cobble Series™  with a wall unit for a designated fire pit space.

Products featured in this look: Cobble Series™ and Cobble Circle by Borgert Products

Inspired by any of the looks you see here? Let’s chat. 


Borgert is a family-owned company specializing in pavers, patios, driveways and retaining walls. We are based in Minneapolis and serve the entire Twin Cities metro area and beyond. Since 1923, we have been committed to providing high quality products that help our customers dream landscapes become a reality. Find a distrubor of Borgert Products near you. 

How to Install Interlocking Concrete Pavements

interlocking concrete pavements

Congratulations on your new interlocking concrete pavements! When you’re ready to install, follow these steps for a smooth, uniform look.

Tools Needed:

  • Wooden Stakes
  • Wide blade masons chisel
  • Masons string ( twine)
  • Stiff bristle street broom
  • -5lb. rubber hammer
  • Hard tooth garden rake
  • Chalk Line
  • 25’ ft. measure tape
  • 1” diameter sand screed guides (pipe, wood, etc.)
  • 6’-8’ ft. 2” x 4” or 2” x 6”
  • Small pry bar
  • 4 ft. Level
  • Wheelbarrow
  • Flat shovel

Equipment:

  • 3hp to 5hp plate compactor ( not a jumping jack)
  • Mason Diamond Saw
  • Block/ Paver splitter

Installation:

First measure area you intend to pave. Determine the square footage by multiplying ( length x width= square footage) and add 5% for breakage. Measure lineal feet of open edges and the lineal feet will indicate the PAVE EDGE required. Draw a plan that shows all of the important dimensions and then take this plan to your supplier so that they can help you determine the amount of materials needed for your project.

Use the 3-4-5 triangle method to determine a perpendicular line and then measure parallel lines from the perpendicular line to find a boundary. Place stakes at every 4-6 feet and at corners. These stakes should be 8” outside of the edge of the pavers.

Excavation:

Note: Before any digging, call your local utility companies to locate any underground lines.

Use a flat shovel to cut evenly to remove sod/dirt to a depth of at least 7” to allow room for a 2 ⅜” paver, compacted sand, and a minimum of 4” compacted crushed stone base. If your house has a new foundation, we suggest you increase base thickness to 6” or a total excavation of 9” within 2 ft. of new foundation. Excavation should be 6” wider on sides where the paved edge restraint is to be used.

Base Preparation: Use either ¾” or ½” graded base material that includes sizes down to fine dust.

Method of Compaction: Run your plate compactor over the excavated soil ( the soil should not get stuck on the bottom of the plate compactor). Each pass should overlap the previous one by 4”. Next, spread your gravel base material out evenly in about 2” layers.

Start around the outer perimeter with the plate compactor and again overlap each pass about 4” working towards the center. You should make at least two passes for each layer. Use the hard tooth garden rake to smooth out any unevenness. When you are finished with the base, there should be no more than ¼” maximum gap anywhere along the straight edge and the base.

Slope and Grade:

It is best to plan a ¼” per foot drop, but try not to exceed ½” per foot.

 Sand Setting Bed- ASTM C33: Lay your screen guides ( 1” electrical conduit, 1’ strips of wood or other suitable rigid 1” guide) 4’ ft to 6’ ft apart and parallel. Work from side to side with your screed guides, screed a 10’ section of sand. You will use the 6’ ft. to 8’ ft 2” x 6” to loosely spread the sand and to strike off any excess.

  • Do not walk on your screeded sand. You will fill the voids with sand and trowel them smooth as you are laying the pavers.

Laying the Pavers ( for small areas only)

Starting from a permanent edge, lay your first paver starting from either side ( as you lay your pavers, work right to left, then left to right and so on, one row of pavers at a time). Set the pavers lightly on the sand and allow 6” to pave edge on the open sides later. If you are starting with pave edge, run a string line across the front of the playing edge every 4’ ft.

Set the pavers hand tight, but do not use a hammer to adjust the pavers or set them.

Cutting the Pavers: You will need to cut the pavers if you have to go around a post or come up against an existing structure or where a radius is desired. You do not need to cut on sides where pave edge is installed. Mary any stones to be cut with a crayon or chalk and allow for up to ¼” gap between the stone and the edge. This will be filled with sand later. You should use either a diamond blade mason saw or a paver splitter.

Pave Edge Installation

  1. Before Sand Screeding: Snap chalk line on base material before you screed sand if you are going to start laying your pavers from a pave edge line first. Spike edging so that the chalk line remains visible. Spike every two feet with 10” x ⅜” diameter steel landscape spike.
  2. After Pavers Have Been Laid: Finish placing the pave edge spikes. First, use a trowel and cut straight down the side of the pavers into the sand down to the base ad pull back the sand. Be careful not to scrape up the base material. Placing the edging flat onto the base, push pave edge frost heave lip under the sand, using a hammer to tap against the back of the pave edge until the edging is tight to the pavers. Now, spike the edging approximately every two feet. Pound the spikes in until the head of the spike is touching the edging.
  3. Use Pave Edge Rigid for Straight Areas

 Use Pave Edge Flexible for Curved Areas ( The Final Step)

  1. Sweep any debris or loose sand off of the Pavers
  2. Using a vibratory plate compactor, 3 HP to 5 HP, you should make at least two passes over the pavers. Starting around the perimeter and working inward overlap each pass 2” to 4” inches. Make the second pass at a 45 degree angle to your first. The first pass of the compactor will accomplish:
  • Level the Pavers, compact the sand bedding, and force sand up into the joint
  1. Use a dry medium or coarse washed sand for the joints, spread a thin layer of the jointing sand over the surface. Use a stiff bristle street broom and sweep back and forth over the entire pavement until sand has stopped filling into joints.
  2. Now, alternating between compacting and sweeping, continue to work the material into the joint. If when you make a pass with the plate compactor and no more joints open up, you are then finished.

Congratulations! You have now installed a high quality pavement for your patio or walkway. For maintenance see icpi.org


Borgert is a family-owned company specializing in pavers, patios, driveways and retaining walls. We are based in Minneapolis and serve the entire Twin Cities metro area and beyond. Since 1923, we have been committed to providing high quality products that help our customers dream landscapes become a reality. Get a quote today on your Borgert products.